SPACE HUB Quick Start
Welcome to SPACE HUB. This short guide will explain the first steps necessary to create your first immersive mix. We guide you through the basic functionality of the application, giving you the tools to start quickly creating in a 3D soundstage with CODA SPACE.
Running SPACE HUB Control for the first time
After downloading the latest version of SPACE HUB Control, follow the installation instructions and run the application.
Connecting SPACE HUB Control to the Processor
Connecting the SPACE HUB Processor is simple and straightforward using a standard network connection. The system is completely flexible. You can choose to connect the computer using wired Ethernet or WIFI.
Connect the SPACE HUB Processor’s Ethernet port to your network, and ensure the computer running SPACE HUB Control is linked to the same network. Ensure that both the SPACE HUB Processor and the Control machine are in the same IP range with a matching subnet mask, so they can communicate with each other.
Once the network is set up, open the Settings page in SPACE HUB Control and navigate to the Engine Interface dropdown list. Select the IP address for this network.
Next, you can find and select your SPACE HUB in the Primary SPACE HUB dropdown list. Now the connection is established and you will see information about the Processor on the settings page and the Primary indicator (Pri) in the Top Bar will turn green.
Importing a Speaker Layout
The speaker layout forms the building blocks of your 3D system. It is easy to import your layout into the SPACE HUB for precise control, so the Processor knows which loudspeaker is connected to which output, and where they are located in the room. This enables precise, phase aligned audio.
If you have already designed your setup in System Optimiser, you can export your design there and easily import it into SPACE HUB Control:
1. Launch System Optimiser’s Quick Command Line (keyboard shortcut: [Cmd/Ctrl + Shift + P]) and type “Export to SPACE HUB”. This will give you a .json file and a window will open, asking you to set the file’s save destination.
2. Return to SPACE HUB Control and open the Speakers page, where you will find a button labeled Load System Optimiser File. Click it and select the .json file that you have just exported. You will see the Speakers appear.
3. Check the orientation and adjust it by selecting Mirror X, Mirror Y or Mirror Z, if necessary. This depends on how you want to align your venues in System Optimiser.
4. If you want to enable Panning for a loudspeaker, you need to set its Function to Immersive in the Speaker Table.
5. Once you have set up your speakers, hit the Send to SPACE HUB Button, and you will get an alert that the Processor has updated its layout.
You don’t have to use System Optimiser. If no System Optimiser project is available for your venue, you can quickly and easily add the Speakers manually and adjust their coordinates in SPACE HUB Control using the Add Speaker Button.
Add the desired speakers, and be sure to set their Function to Immersive and hit Send to SPACE HUB once you’re finished.
Routing Audio Inputs and Outputs
Now it’s time to start routing signals into and out of the SPACE HUB. First connect all required devices to a common Dante network, following Audinate’s guidelines.
Then start Dante Controller and make sure that all your devices display, and that there are no errors. If you are having trouble finding a device, it might be in the wrong subnet and have a static IP.
Tip
It’s good practice to label all your devices as well as all individual channels in Dante Controller first, before routing them. This way it is simple to patch devices labelled, for example, output “Left Surround” from the SPACE HUB to input “Left Surround” on the matching amplifier, instead of resorting to complicated tables.
Once all devices have been discovered in Dante Controller and you have labelled the channels, set them all to the desired sample rate. Afterwards you can start routing the output of your DAW or mixing desk to the inputs of the SPACE HUB, and the outputs of the SPACE HUB to your amplifiers.
When you send a signal into the SPACE HUB you should now see the Input Meters react in SPACE HUB Control.
If you want to test your output routing, the SPACE HUB has an integrated Signal Generator, which allows you to send White Noise to a particular speaker. You can control this on the Speakers page with the Buttons labelled Test for all your individual outputs in the Speaker Table.
Configuring an Object
You can also take advantage of object-based mixing. Let’s look at the Object Parameters within the Object List. For now, we can control these from SPACE HUB Control’s User Interface only. Firstly, change its name. To rename an Object, just double-click the default or current name and enter the desired name.
While we’re in the Object List, let’s take a closer look at what else we can do.

Left of the Object’s name you have the visual options:
V Visual Solo - selecting this will cause only this object to appear in the panning circle
H Hide - selecting this will hide the object from the panning circle
Link Stereo Objects
Right of the Object’s name you will find audio properties:
Level control over the object, with levels ranging from -144 to 0 dB
S Solo (can be switched between PFL and SIP on the Settings page)
M Mutes the selected object
An Input Meter shows changing input levels for each object

Next to the Object List you can modify the parameters of the selected Object.
Here you can change the Object’s name and assign a different Colour to it, which helps you to stay organised when creating your mix. Below that, you can link it to another Object to create a stereo pair. The lower selector allows you to pick the panning algorithm for the selected Object.
Below this there are three sliders to move the selected Object in space using spherical coordinates: Azimuth, Elevation & Distance
Spread alters the stereo width of an Object, and how many different speakers the sound is passed through. LFE1 and LFE2 sliders send the signal to the Aux / LFE Buses.
If an Object is linked as a stereo pair, another slider that controls Stereo Width between the linked Objects appears below.
orbit and random refer to Orbits, which you can create on the Orbits page
If you would like to increase or decrease the number of Objects, you can adjust this on the Settings page in the Project Tab.
For a more in-depth description of Object parameters, as well as their panning, metering and mixing, go to the Objects page.
Generating Orbits
Orbits are trajectories that SPACE HUB objects can follow. This is a powerful feature of SPACE HUB Control, allowing for the launch of multiple Objects into ‘Orbits’ within 3D space!
You can define trajectories, or specify ‘zones’ within which the Object parameters will randomly change.
Select an Object, go to the Orbits View, click ‘Record’, then in the panning circle click and drag the shape of your desired Object trajectory. Click ‘Play’ to see your Orbit being played.
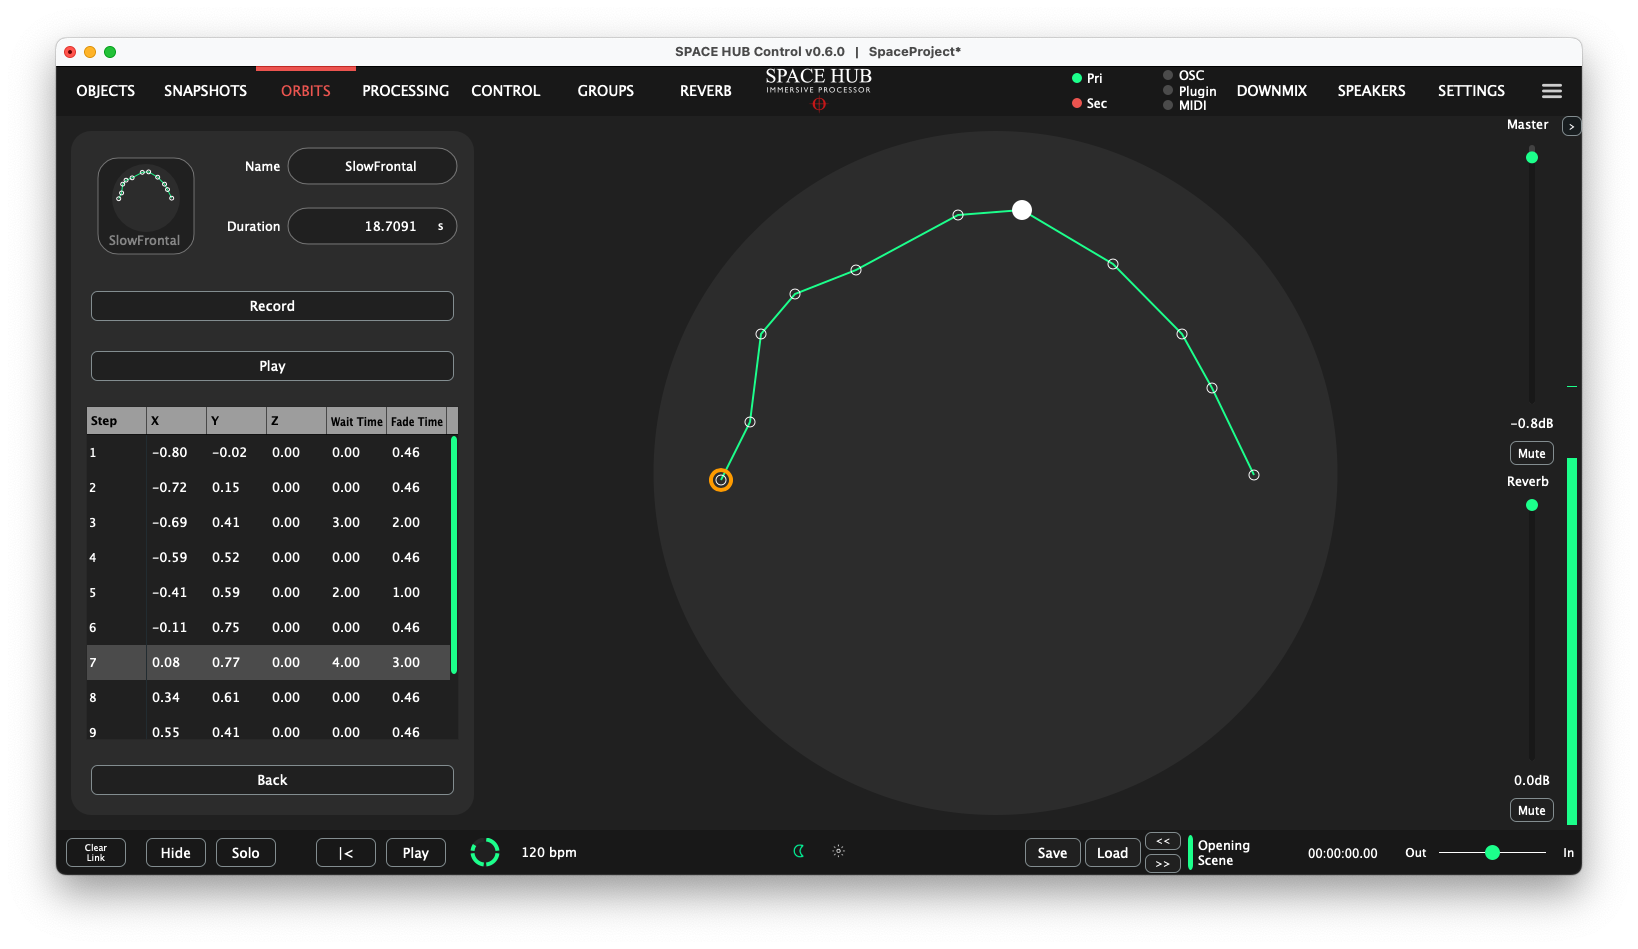
Orbits can be named and saved for later use within the Objects View. Orbits that have been associated with Objects can be enabled and played from the Objects View.
To get more information about defined Orbits, Random Orbits and the range or parameters associated with them, go to the Orbits View.
Creating a Snapshot
Snapshots allow you to quickly switch between different scenes and change the configuration.
Drag the Objects to the desired positions and open the Snapshot View.
When you click New you will see a Snapshot appear in the list, which will automatically be selected and active. Snapshots can also be renamed by double-clicking their names.
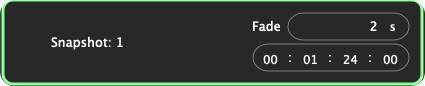
Snapshots can be loaded manually, or they can be triggered to load via MIDI Time Code (MTC), MIDI Program Change or OSC commands. A Snapshot page allows for the addition of snapshots. Each snapshot can be allocated a fade-in time and a time code value for MTC triggering. A snapshot can be set to automatically follow another snapshot after an adjustable wait time.
Now, let’s create a second Snapshot: Move the Objects to a different configuration and positions and click New, another Snapshot will be added to the list.
During a show, or in the interval, you can switch between Snapshots with the << and >> buttons which will load them immediately, or you can select a Snapshot with the left and right arrow keys on your keyboard and recall the selected one with the space bar.
Additional options to load Snapshots via OSC or MIDI Program Change or Timecode can be found on the Control page in the Snapshots Tab. There, you can also assign a Reverb Preset that will be linked to the Snapshot.
Adding Reverb
Reverb can be a powerful tool to add a natural and atmospheric feel to your immersive experience. It is yet another creative option to explore and create a more impactful audio experience.
To add Reverb, we need to activate the Early & Cluster as well as the Late send for each Object on the Processing page.
Next we have to adjust the return levels from the three Reverb Buses (Early, Cluster and Late). Let’s take a look at the Reverb page, where you can control all of these parameters.
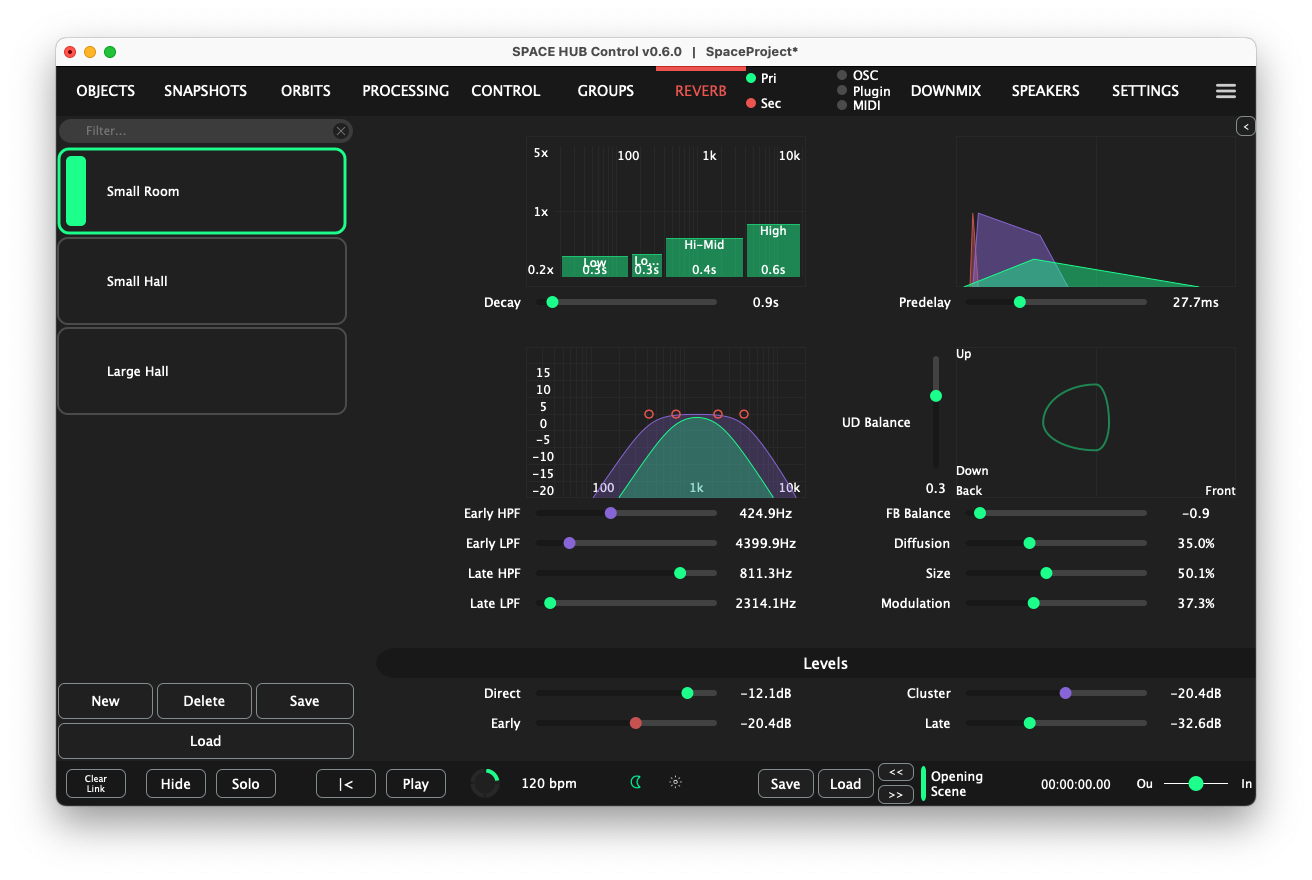
On the left-hand side of the user interface you can find a list of Reverb Presets that allow you to quickly alter the parameters and recreate different acoustic spaces.
Presets can be added with the New button after adjusting the parameters on the right-hand side.
- There are different options to recall a Reverb Preset:
Moving Objects with the Plugin
The Plugin allows detailed movements that are linked to a timeline, as the soundstage evolves and adapts through time to suit your visual needs and create stunning aural movement.
Simply open your DAW of choice, load the Plugin onto a track, select the Object that you would like to control with it, and you can start writing automation.
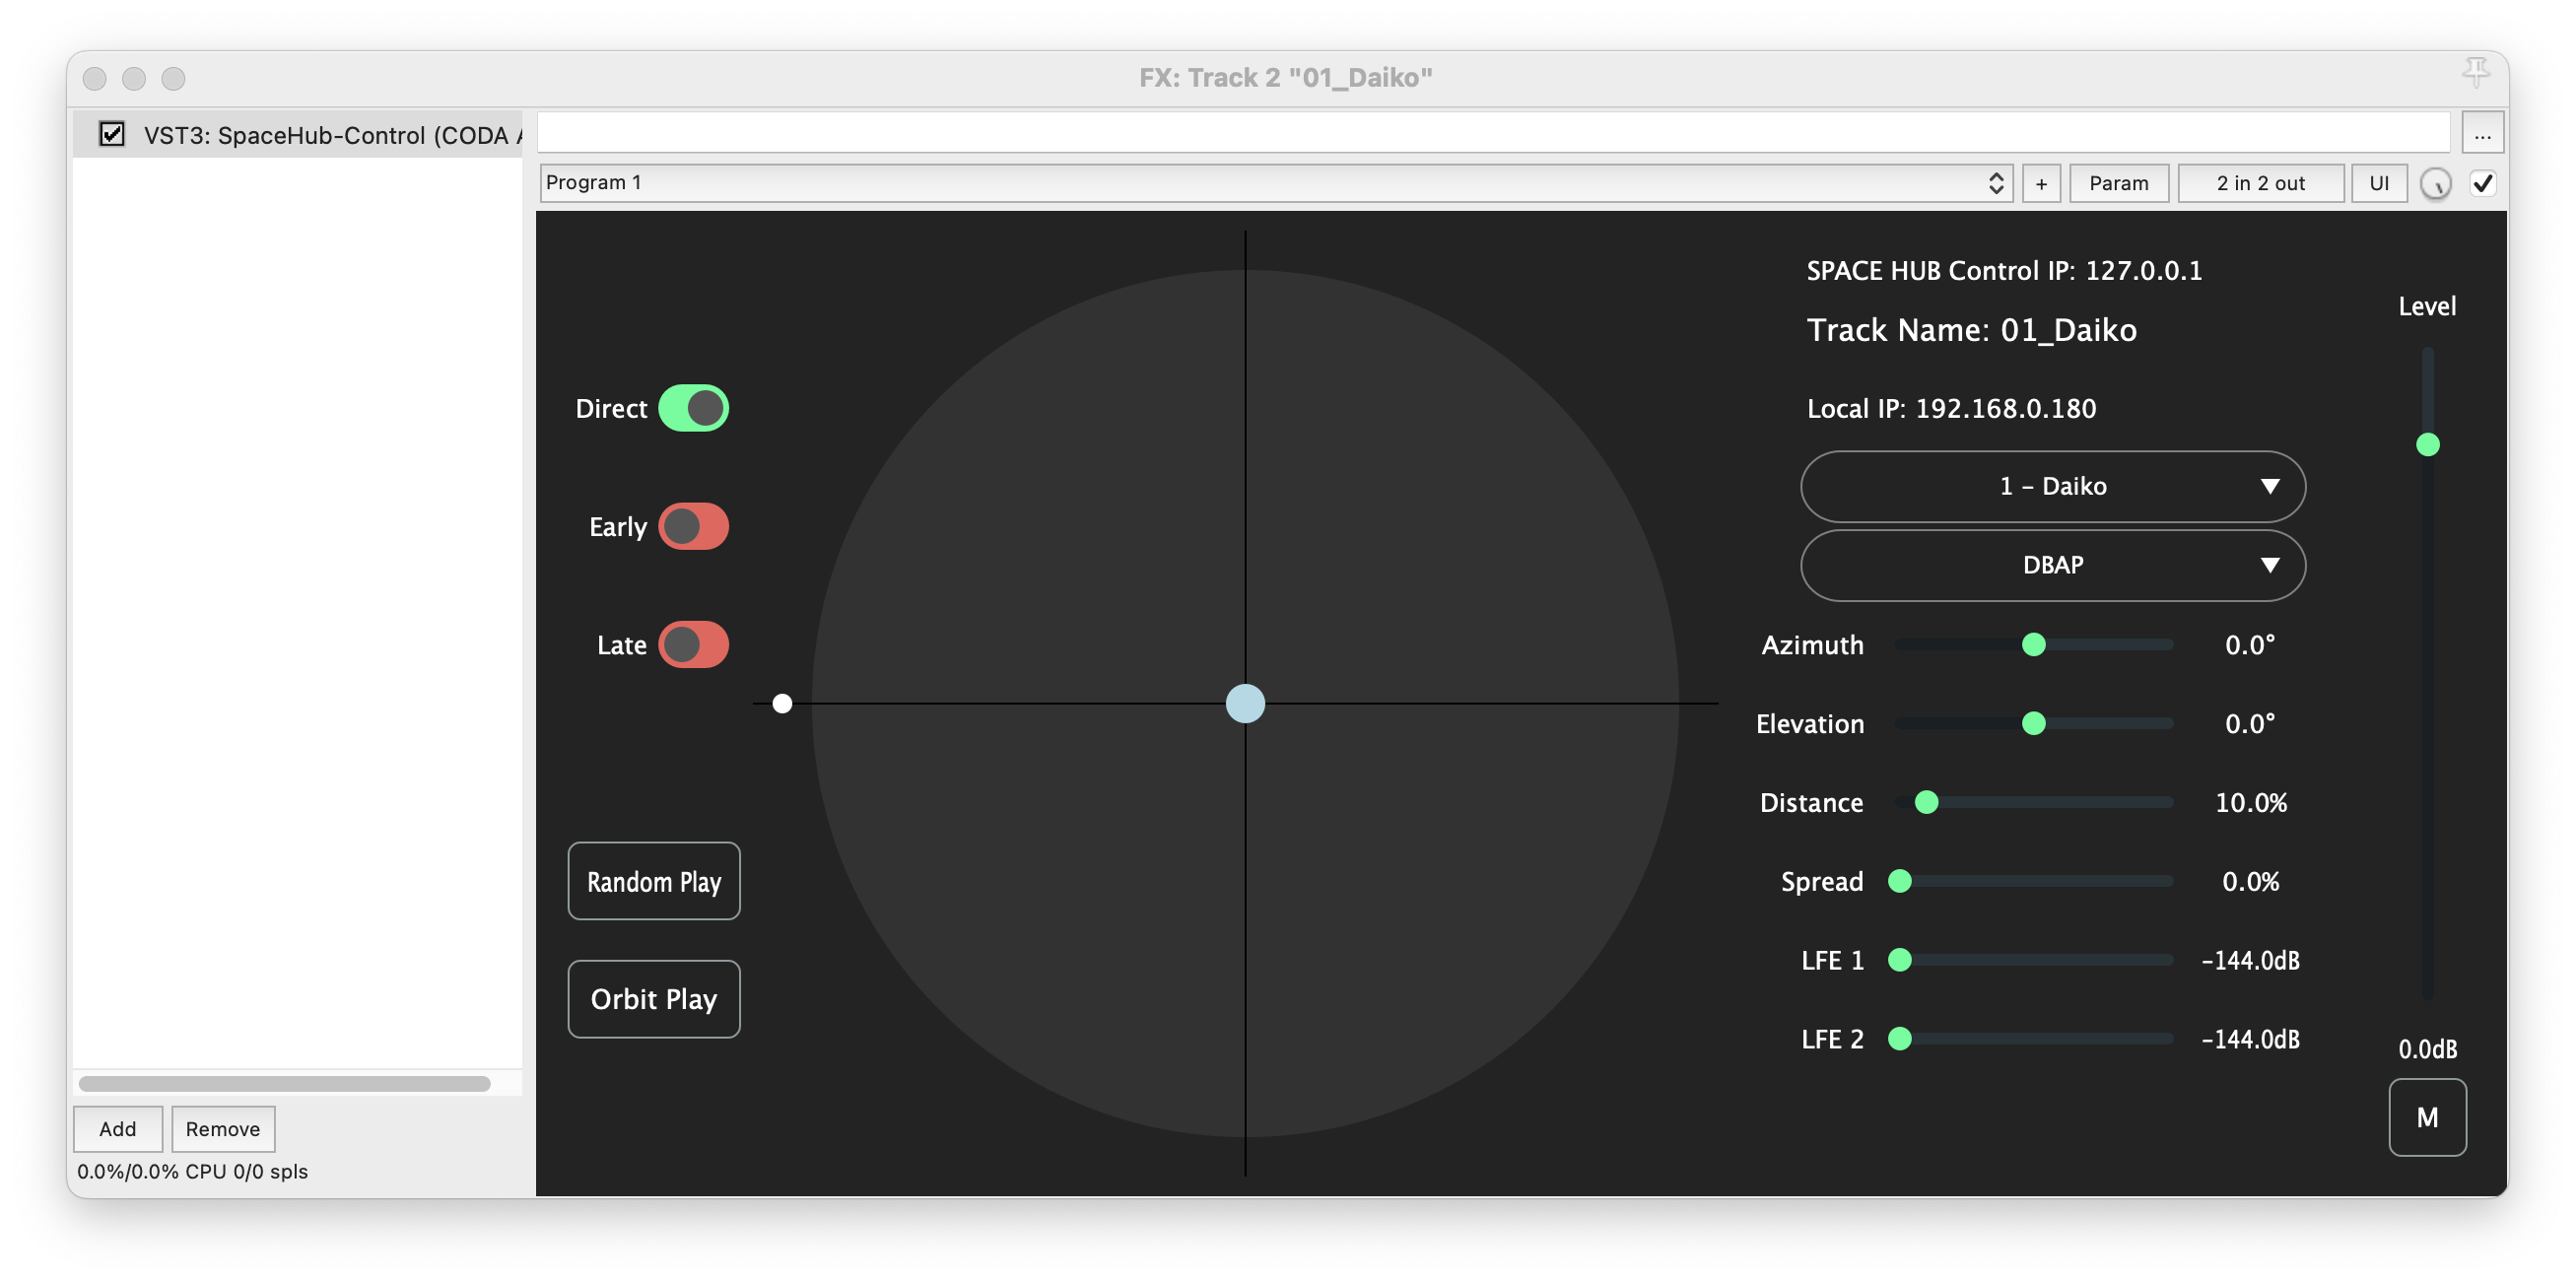
The Plugin gives you the same impressive object controls and parameters that are shown on the UI (Azimuth, Elevation, Distance, Spread, LFE, Stereo Width & Algorithm), routed to your DAW ready for automation. The steps necessary to set up parameter automation differ from DAW to DAW, so please refer to the DAW’s manual if you are unsure about this.