Orbits View
The Orbits view allows you to create trajectories that objects should follow. The trajectories can be drawn or defined in a stepwise fashion. It is also possible to define an area within which an Object can move at random.
Orbits with Defined Trajectories
When you first select the Orbits view, you will be able to create a new Orbit. You should then click ‘Record’, following which, you can either:
Drag your mouse along your preferred trajectory or
Successively click your mouse at points along your preferred trajectory
The first approach will result in a continuous trajectory with many steps. The second approach allows for the entry of points where the trajectory changes. Lines are drawn between trajectory points to show the interpolated trajectory path.
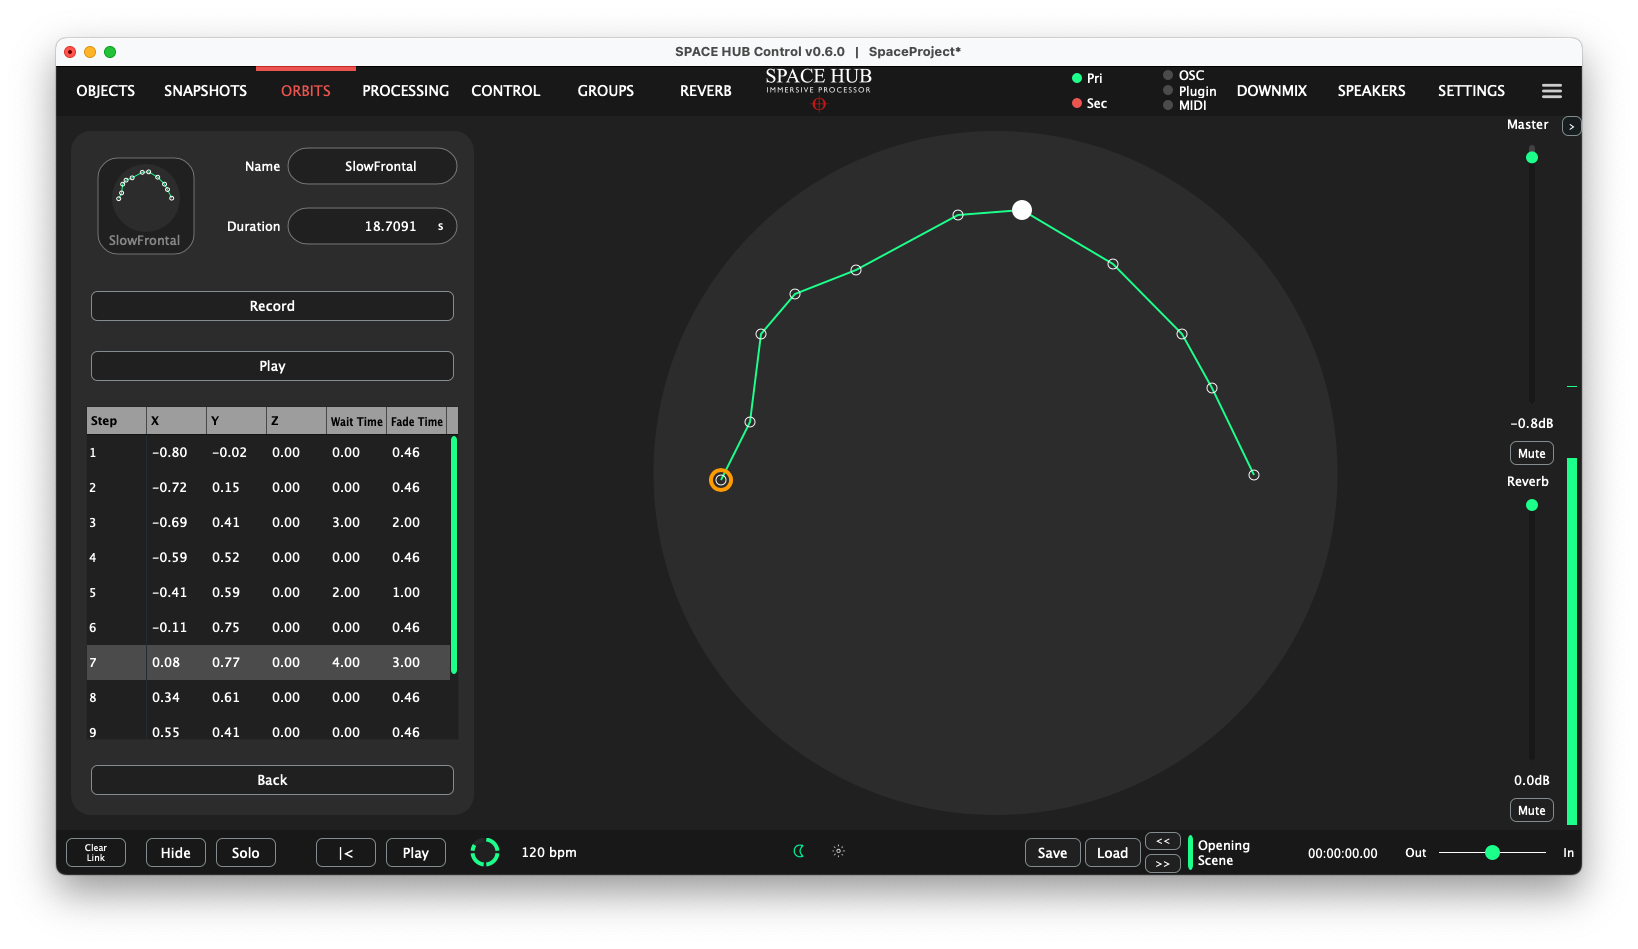
You can provide a Name for the orbit, and also indicate a preferred Duration.
When you have completed trajectory entry, you should click ‘Record’ again. After this, you can delete any trajectory step by double clicking it. You can also enter a further trajectory point by double clicking an empty spot where you would like the trajectory to advance to.
To the left of the trajectory display is a table of trajectory steps, where the column headings are:
Step | x | y | z | Wait Time | Fade Time
There is a row entry for each step containing the attributes of that step.
Step - indicates the step number
x y z - the 3D coordinates
Wait Time - the time spent waiting at the step
Fade Time - the time until the next step position is reached
Each of these attributes can be changed by double clicking and typing a new value.
Values in multiple contiguous rows can be edited by:
Holding down the Shift key
Successively selecting rows
Double clicking and changing the value within a column
All entries within the selected rows and within that column will be changed to the new value.
The effect of the changes can be seen by clicking the Play button. On doing this, the tractory will be followed by a small orange circle.
You can continue to create new orbits and edit them:
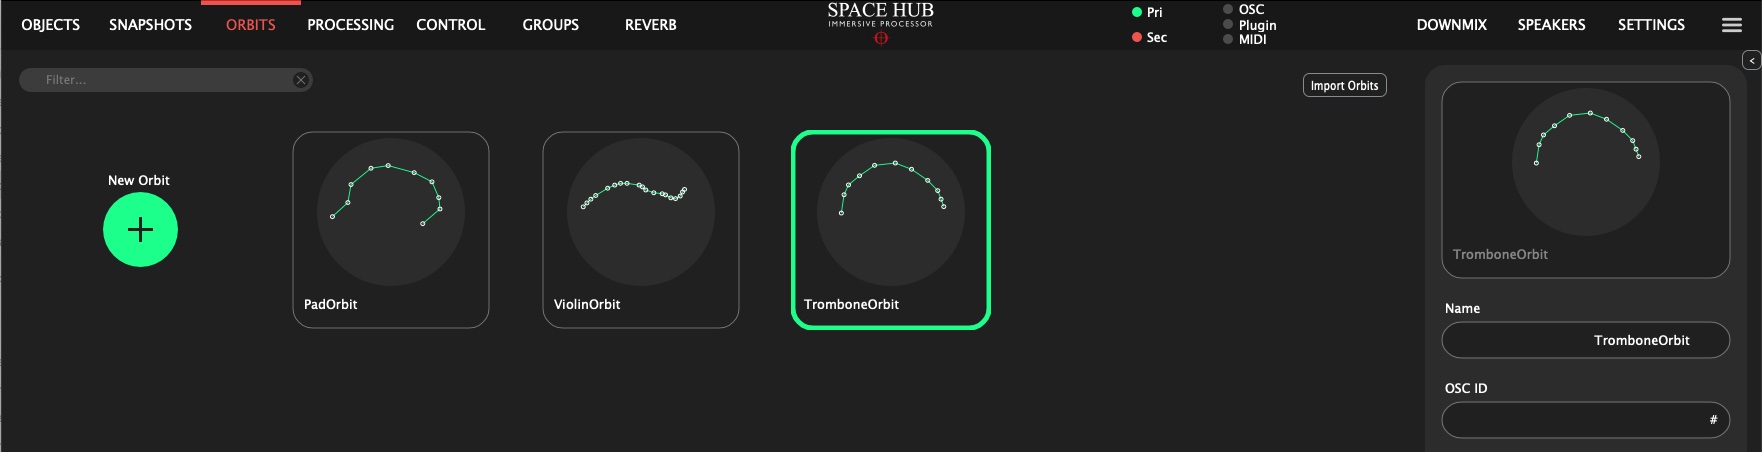
You can import Orbits from other projects by selecting the ‘Import Objects’ button towards the top right of the Orbits page. When you select and open a project, the Orbits from that project will be incorporated into the current project.
Once you have completed Orbit creation, you can select the Objects tab and get back to the familiar Objects page. At the bottom of this page, to the right of the Objects list, you will see the orbit and random buttons.
If you select the orbit button, you will see a column of orbit attributes. At the top of this list, a large Empty orbit button will be displayed. If you click this button, you will see all your defined orbits displayed as large buttons.
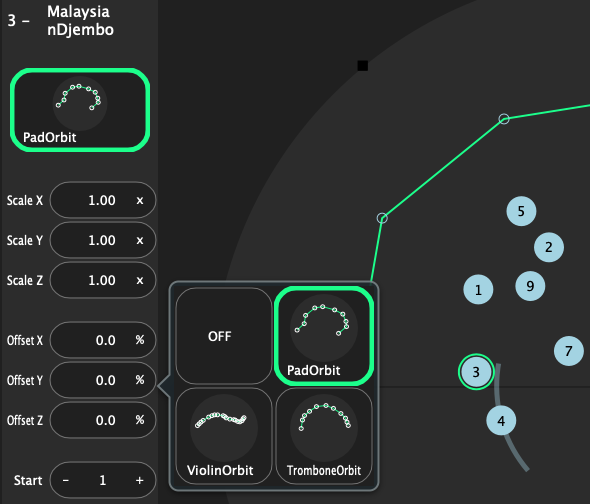
To display the Orbit trajectory of an orbit, simply click on the associated button.
At the bottom of the Orbit attribute list is a Play button, which arms the Orbit for play back. If you now select the Play button below the object list, the object trajectory will be ‘played’ by the object’s small display circle
Further attributes for a defined trajectory are:
Scale X, Scale Y, Scale Z - these allow you to scale each coordinate of the trajectory. A value above 1 will scale up the coordinate. From 0 to 1 will scale down the coordinate.
Offset X, Offset Y, Offset Z - these allow you to offset each coordinate of the trajectory by a percentage
Start - sets the starting point (in terms of steps) that the Orbit will be played from for this Object.
Time - this allows you to expand or contract the amount of time that is used to play through the trajectory.
Loops - indicates the number of repeats of the trajectory. Directly below this option is a selector to enable infinite looping.
When you exit the orbit trajectory display (button below the Play button), you can once again choose to select the type of orbit to define - defined trajectory or random
Orbits with Random Trajectories
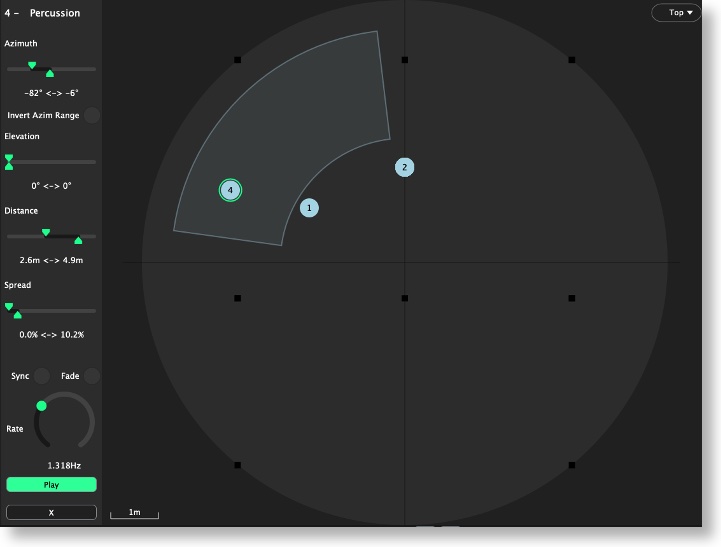
If you click the random button, you will be presented with a number of attributes that relate to the creation of a zone within which random movements are constrained. The following attributes can be modified:
Azimuth - varies between -180 and 180 degrees. There is also a selector that will allow you to invert the range (eg. -131 to 20 will be 20 to -131)
Elevation - varies between 0 and 90 degrees
Distance - varies between 0 and the maximum radius
Spread - varies between 0% and 100%
In all cases the lower bound and upper bound can be varied. When playing the random trajectory, random values are chosen within the bounds of each attribute.
Fade - if this is selected, then transitions between any two random states will be smooth. If not selected, then there will be jumps from one random state to the next.
Rate - this slider will determine the speed at which transitions to new random states occur. This slider will not be present if ‘Sync’ is selected.
Sync - if this is selected, then a beat counter (bpm on the bottom toolbar) will determine the speed of random state transitions.
The beat counter assumes that there are 4 beats to a bar. Directly below the Sync/Fade selectors is a drop down box, which allows for a selection of note or bar value. This determines the number of beats between each random state transition. If, for example, the bpm value is 120, and the “note” selection is 1/2, then there will be 60 random state transitions every minute. If however, the “note” selection were to be 2 bars, then there would be 15 random state transitions every minute.