Objects View
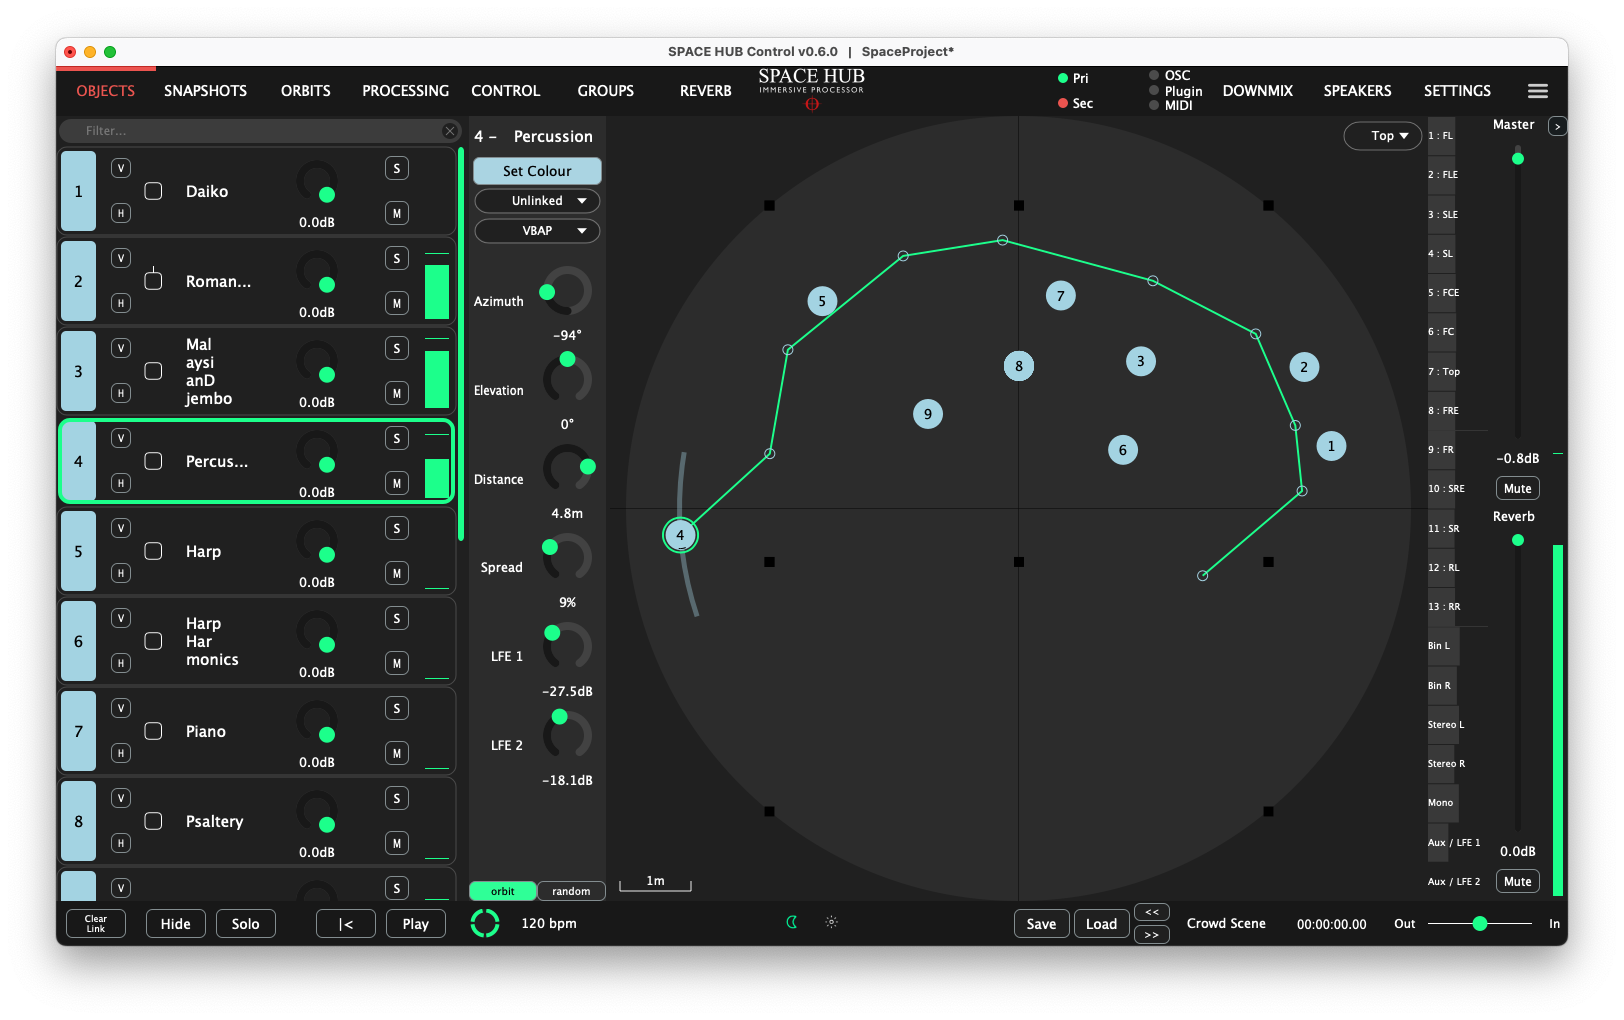
Object List
Object-based mixing is easier than ever in SPACE HUB Control. Quickly and easily build an audio environment by placing “objects” within 3 dimensional space.
Object View contains all Objects which are currently active. You can add or remove Objects in a project using the Settings Page in the Project Tab.
To change an Object’s name, double-click it in the Object List. The following options are available for each object in the Object List, starting on the left side:
V Visual Solo to hide from the panning circle all but this Object. The Visual Solo state follows the selected Object.
H Hide this Object from the panning circle (becomes visible when selected)
Link Stereo Objects by clicking the checkbox of the left channel Object to link it to the Object below. The link status (unlinked or stereo) will be shown in the drop down field directly below the “Set Colour” selector.
To the right of the Object’s name you will find audio properties:
Level control over the object, with levels ranging from -144 to 0 dB
S Solo (can be switched between PFL and SIP on the Settings page)
M Mutes the selected object
Input Meters Show changing input levels for each object
Object Sliders
You can adjust a variety of parameters with the sliders next to the Object List. More control, and even more impressive effects to tailor a performance to your precise needs.
The name and colour of an Object can be changed, stereo pairs can be created, and the Panning Algorithm can be selected.
The set of sliders give access to the parameters Azimuth, Elevation, Distance to move the Object in spherical coordinates. The Spread parameter makes the Object sound wider and cover more of the immersive audio soundscape. There are two LFE sliders, LFE 1 and LFE 2. These are level controls over auxiliary sends to the LFE buses. On stereo Objects an additional slider that modifies the stereo width appears.
Panning Area
The Panning Area gives you a visual representation, where Objects can be easily positioned by dragging them with the mouse. Hear the sound move and glide around the room as you position these objects within the visual representation, the Panning Area.
Objects are represented as coloured dots with their respective number inside. The selected Object has a green highlight. The Spread of the sound is also shown as an Arc on both sides of the Object. The LFE parameter is displayed as a black Arc inside the Object dot.
By default the Area is shown looking down from above, in a “birds-eye” view. This can be switched to a view from the rear of the room looking towards the front. To select the viewed direction, select either Top or Rear using the selector in the upper right-hand corner of the Panning Area.
Loudspeaker positions are displayed as black rectangles if the particular speaker is used for Panning. If not used for panning, a loudspeaker is represented by a grey rectangle.
You can easily zoom in or out using the Zoom Slider in the Bottom Bar, or the pinch gesture on a touchpad. The scale of the viewed area is shown by a 1m line in the lower left-hand corner of the Panning Area.
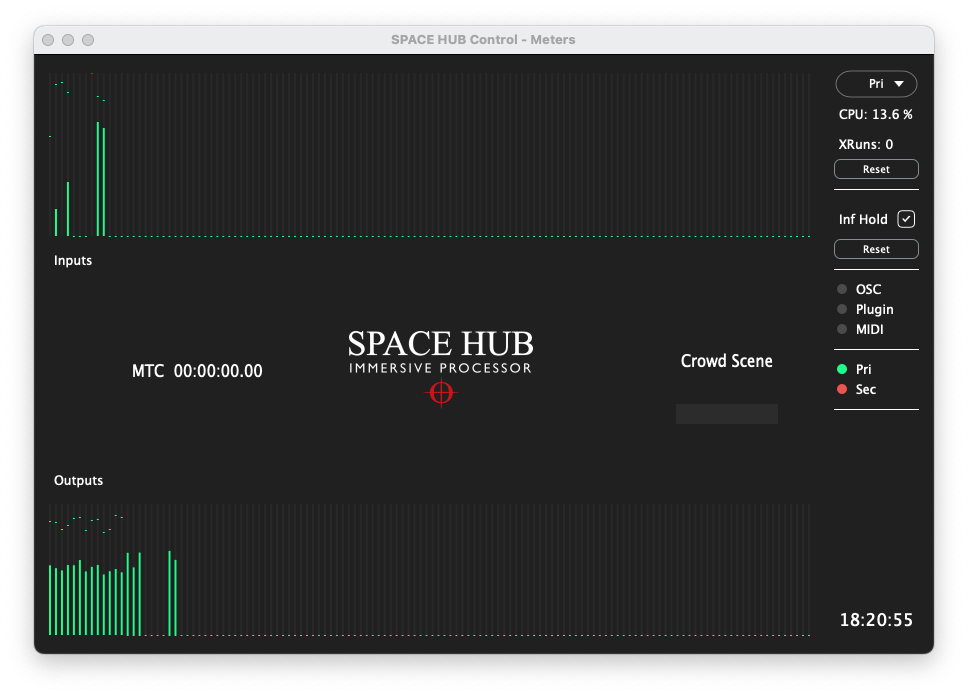
Output Meters
To the right of the panning area RMS metres for all Outputs are displayed as horizontal bars. In order to get a more detailed view of all Input and Output levels with both Peak and RMS, a separate Meters Window can be opened. You can select it from the (hamburger) menu icon at the top right of the control window. To the right of this window, you will see:
XRuns - counts buffer over-/under-runs within the SPACE HUB Processor
Reset - resets the buffer overrun counter
Inf Hold - sets the Peak Hold time for the meters to infinite hold, to permanently display the absolute peak value.
Reset - resets the peak hold value
OSC Plugin MIDI activity indicators - these are activity indicators for OSC, plugin and MIDI control messaging
Mixer
Apart from level control within each object, there is also an input level mixer window. This can be selected from the (hamburger) menu icon at the top right of the control window. The level changes made in this level mixer will be reflected in the Object levels, and vice versa
There are two rows of buttons at the top of the Mixer window:
The first row enables phase inversion for each input.
The second row enables the muting of each input.
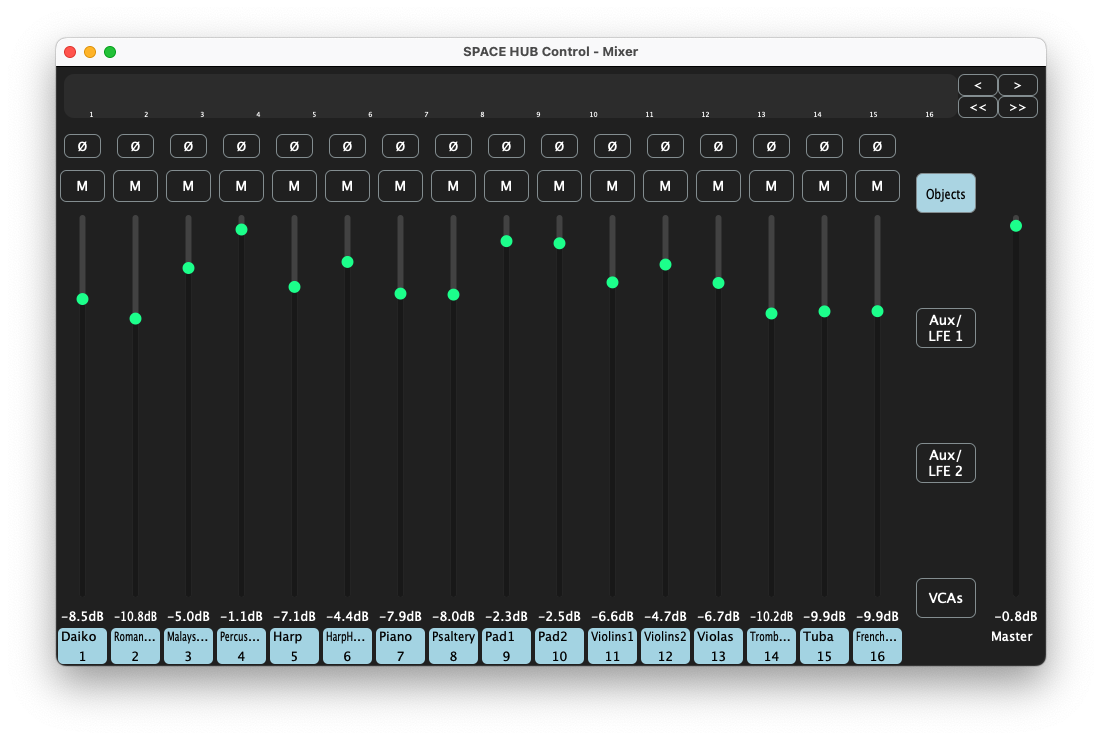
Objects When selected, the Mixer Window faders will control the input levels of the Objects
Aux/LFE 1 When selected, the Mixer Window faders will control the send levels of the Objects to the Aux/LFE 1 bus
Aux LFE 2 When selected, the Mixer Window faders will control the send levels of the Objects to the Aux/LFE 2 bus
VCAs When selected, the Mixer Window faders will each be assigned to control an Object VCA level. Refer to the Processing page for more information regarding the role of the VCAs.
Master Fader and Reverb Fader
On the far right of the Object View, the Output Level of the SPACE HUB Processor can be adjusted with the Master Fader and Reverb Fader.
The Reverb Fader specifically controls the level of the two Reverb buses.
The dB range of each fader is -80dB - 0dB
There are Mute buttons below each fader to mute, respectively, the Processor outputs and its Reverb buses.
The Master fader parameter is also accessable via OSC with the address:
/master/gain {float 0.0 - 1.0}
where 0.0 is mapped to -80dB, 0.5 is -6dB and 1.0 is 0dB.
Next to the Master Fader there is the vertical Master Output meter which displays both the highest Peak and the highest RMS value of all Output channels (not an average, but worst-case).
The Master Fader and Reverb Fader can be shown on any page by clicking the small arrow under the Menu Button.